Start Fresh!

I went into my classroom earlier this week, just to get a few things ready for the new year.  I always move student desks around to give them fresh beginning.  I also give them some fresh school supplies.  I throw away old pencils and replace with new sharpened ones.  I give every kiddo a new eraser, etc.

Our grade level asks students to bring in 2 boxes of crayons for school supplies at the beginning of the year.  I always give them one, and then put the other box away for the new year.


When students arrive back to school next week, they will have a fresh box of crayons to use.  You would think it's Christmas all over again... they get so excited about all the new supplies.

It's just something small, but this helps my students get excited after a long winter break and ready to begin school fresh!

How do YOU start fresh in YOUR classroom for the New Year?

New Math Journal Packet on TPT: Comparing Numbers

I just uploaded the latest in my series of Math Journal packets onto TPT.  We are getting ready to teach comparing numbers after winter break, so I made up this set of math journals for my  class to work on for daily practice as we progress through the unit.

My kiddos have been loving completing a daily math journal each day, so I know they will love working on this new set in January.  I will post some pictures of them in use once we head back to school.  For now, you can take a look at the preview in my shop...

Math Journals:  Comparing Numbers

Parent Gifts

We completed our gifts for parents today!  This is the first year that I've made these cute little snowman votives and I LOVE the way they turned out!  Each snowman has its own little personality.
I found the votives for just 77 cents at WalMart.  Before we began this project, I used a blue sharpie to write each student's name and the year on each votive.

To make these, I poured a little white craft paint on a paper plate.  You can get this at WalMart.  Students used their thumb to make two thumbprints for the snowman.  We let these dry overnight.
 The next day, we used these painters pens to paint on the eyes, nose, mouth, buttons, and stick arms.  These were extremely easy to use, just make sure you explain to the kids that it is paint and not to smear it.  We didn't have any mistakes at all... a very simple project for my 1st graders.
I picked up these painters at WalMart when I got the votives.  I think they were like $1.96 each and they come in lots of colors.

That's it!  We let those dry, put in a tealight candle, and they were ready to wrap.
To wrap these, we colored white paper bags to look like snowmen.  Want to take a guess where I picked up the white paper bags?  You guessed it... WalMart.  One stop shopping for this project, people!

Beforehand, I cut out the corners from the bags so that the top could be colored like a hat.  Then, the kids got creative in coloring them and wrote their "To" and "From" on the other side.

We wrapped our votives in tissue paper, put them in the bags, and that's it.  Done and done!

I will definitely be replicating this little gift next year.  Probably the cutest, fastest, easiest gift I've done with my kiddos to date.

I hope you can use this idea, if not this year, then someday!

Thanks for stopping by!

Money Match - Christmas Theme

***FREE!  Today only!  Follow my blog, TPT store, Instagram, and/or Facebook page and download my brand new Money Match cards for FREE!***
 
This week we have been learning all about money.  We began with coin identification and values, then moved into counting and sorting like coins.


On Friday, we began counting mixed sets of coins.  I made up these Money Match cards to help us count and sort various coin amounts.  My kids love the challenge of completing a match.  They will literally rush to get it completed before clean up time.  It's a great motivator, for sure!


 These cards have 14 different coin values represented on the green cards.  These cards match up with 3 red cards, each representing a different way to make that coin value.


My kids loved working with these this week, so in the interest of holiday spirit I'm making them FREE to you today only!  All I'm asking in return is that you follow me:  on my blog , TPT, Instagram, and/or Facebook page!  I'm trying my best to get my name and products out there amongst so many other teacher bloggers and TPT'ers!  Thanks for your support!

Get your Money Match cards for FREE, today only!  After that, they will be available for sale in my TPT shop here.

Money Match Sorting Cards - Christmas Theme
I hope they are helpful to you and your students!
Have a Super Saturday!

Addition & Subtraction Strategies to 20

Just posted a new Math Journal to TPT!  I have been creating sets of Math Journals as I progress through 1st grade curriculum this year.  We have just finished this math unit in my classroom and I compiled these math journal problems from the addition and subtraction strategies we've been learning about.  I'm happy to share them with you!

The strategies covered are:
Adding and Subtracting 10
Ways to Make 10
Making 10 to Add (compensation)
Doubles
Addition with 3 Addends
Fact Families


If these are strategies you use in your classroom, hop on over to TPT to take a look!

Math Journals:  Addition & Subtraction Strategies to 20

A Makeover for your Pointers

Hello Teachers!
Happy Saturday!  I'm on Fall Break so I'm excited to actually have a little time to catch up on some blogging, and have some "me" time this weekend.  This is a photo I took a couple of months ago and then realized I'd never shared it.  {Sigh} How is it already nearly November?!?!

Anyway....
Just a quick tip today about how to quickly jazz up your pointers.  I picked up these pointers in the Target Dollar Spot just before school started this year.  They had boring white handles.  My teenage daughter knew just how to spice them up using her collection of Duck Tape!


Wrap some fun, coordinating Duck Tape around the handle for an instant makeover!  With so many colors and designs available these days, you are sure to find a color and pattern you love.  {Oh geez, now I sound like a commercial.} 

My students love using these to read big books or those large copies of Scholastic News that come with your bundle each month.

This is an older pointer we wrapped with tie dye Duck Tape a few years back.  The tape has held up beautifully!

So, grab some Duck Tape and get wrapping! 

Math Facts... here we go!

We have begun our study of Math Facts.  I like to begin only after we have begun our unit of study on addition and subtraction strategies.  Once we know some strategies, we can then begin to learn specific math facts.

 
You can read about the program I follow for teaching math facts here and here.

Last week, we concluded our study of +1 and +2 facts and began working with -1 and -2.

Here you can see my kiddos practicing during math stations with Math Facts Cards.

These kids are working with my Addition +1 & +2 Math Facts Cards.  They include missing addends, which ramps up the challenge.  My kids love to spread out on the floor and try to complete the whole set, matching addends and sums, before our time is up.

These two are beginning to work with the Subraction -1 & -2 Math Facts Cards.

Typically, each new set of math facts begins with an investigation and mini-lessons to teach strategies.  I'm a firm believer in kids learning strategies, rather than just memorizing facts.  Once they have some strategies in place, they can better understand addition and subtraction and develop their number sense.

Once we have some strategies in place, we practice our math facts at math stations.  These Math Facts Cards are their favorite.  They love the challenge of it and being able to collaborate with a partner. 

To see all the Math Facts Cards sets I have available, click here.  They are available as individual sets, as well as a bundled set.

Math Facts Cards - Bundled 8-Set Pack

Check them out!

Pennants for your home!

I just finished decorating my entry way table for Halloween.  Well, that's not actually true... I decorated it 2 weekends ago (I got a little excited), but today I put the finishing touch on it!

A pennant banner!

I use these all the time in my classroom.  See here and here, but I'm so excited about the idea of also using them at home!


I went with the Orange Chevron set, but wouldn't these look so cute for Halloween in Purple Chevron, or a combination of the two?  And I love to be able to incorporate punctuation.  What kind of Boo! doesn't have an exclamation point, right?

I'm already dreaming about Thanksgiving and Christmas banners for the fireplace!  I hope this inspires you to try banners in your own home. 
Pennant Banners Orange Chevron Set
Click the picture above to see my Orange Chevron Pennant Banners set.  To see my entire collection of pennant banners available in TPT, click here!

Happy Saturday!  Thanks for stopping by!

Outta Sight!

Oh, goodness.  My Super Words Flashcard Ring was in need of a makeover.  It was the very first product I created for TPT, so, you know, it was so last year!  lol


But, seriously.  This product was the very reason I began selling on TPT because I was so excited about my Super Words flashcard ring and what it has done for my 1st grade students.  I mean, 5 years of using it in my classroom and each and every group of students has fallen in love with those little beads.  Who knew pony beads could be so motivating?!


You can read all about how I use Super Words Flashcards to teach and motivate my students to learn 220 sight words in the course of a year.  CLICK HERE for that post.

Check out the newly updated product here.  It comes with weekly flashcards for the whole year, assessments, motivating incentives, and full directions.

I also bundled this packet along with several other coordinating products.  Games, sight words cards, word wall cards, etc.  You can check them all out in my store where you will find all the links provided in the Product Description.

https://www.teacherspayteachers.com/Product/Sight-Words-Bundle-2074326


I hope you love it as much as my students and I do!  Thanks for checking it out!

Yay for Pennants!

Loving how my writing center is starting to come together.  This year I moved it to a new location in my classroom.  I used to have a bulletin board in the old location, but over here I only have a boring beige wall.  (Yawn...)

So, I decided to create a bulletin board on the wall to sort of frame the space.  Today, I added a pennant and I love, love, love how it turned out.

Here's a tip for cutting pennants, and anything else really.  For 15 years I taught rubber stamping, card making, and paper crafting and this simple, little tip makes a big difference in your projects.  Tip:  Leave a white border space around your pieces.  It makes it easier to cut because you don't have to trim precisely on the edge.  The white border creates a frame and compliments the projects. 
 
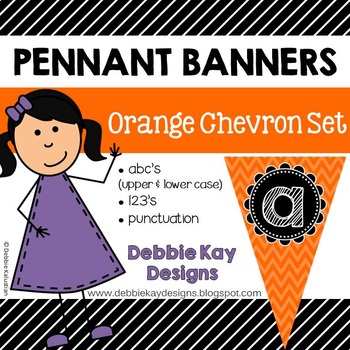
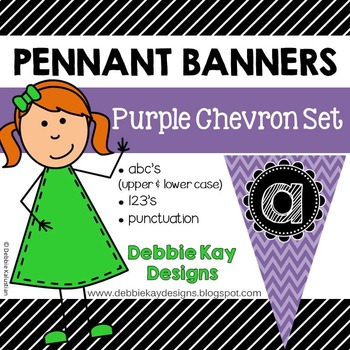
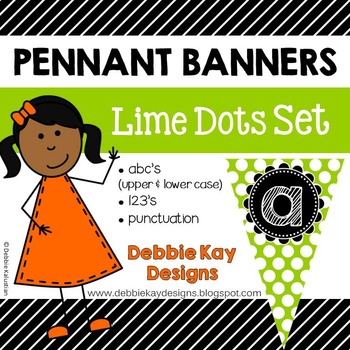
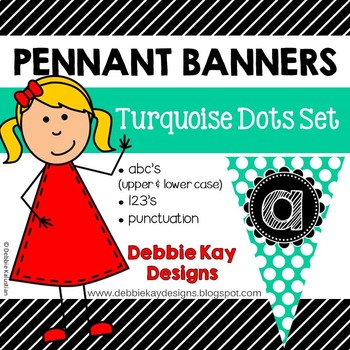
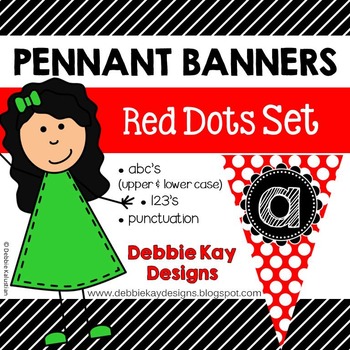
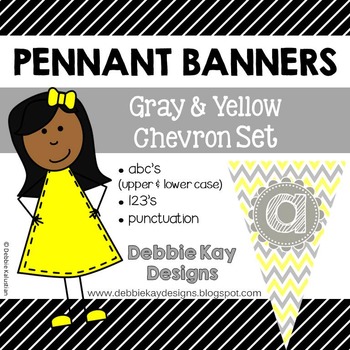
These pennant banners are one of many patterns/colors available in my TPT shop.  The set includes:
-Upper and Lower Case alphabet
-Numbers 0-9
-Symbols (period, question mark, exclamation mark, hyphen, ampersand, and apostrophe)
 
With the symbols included, the possibilities are endless.  See how I used an exclamation mark on mine?

Visit my TPT shop to see more colors available in chevron and polka dot patterns.

Pennant Banners Purple Chevron Set
 
Pennant Banners Lime Dots Set
 
Pennant Banners Turquoise Dot Set

Pennant Banners Orange Chevron Set
  
Pennant Banners Red Dots Set

Pennant Banners Gray and Yellow Chevron Set

Pennant Banners Pink Dots Set

Thanks for visiting!
Last Chance!  One more date has been added to take advantage of Back 2 School savings at TPT!  Stock up on items on your wish list!
Click here to shop and be sure to use Promo Code MORE15.

Back 2 School Sale on TPT!!

It's coming!

Have you heard?!  The TPT Back to School Sale is coming on Aug. 3 & 4!

Woot woot!

Time to buy all the items on my Wish List!

Don't forget to stop by my TPT shop and see all of my products on sale, too!

https://www.teacherspayteachers.com/Store/Debbie-Kay-Designs
Be sure to use the PROMO CODE:
BTS15

Happy Shopping!

Bulletin Board Progress... and a Fail!

This week I've been working on putting up new bulletin boards in my classroom.  I'm fortunate that our school does not require us to take them down at the end of the year; however, I've had the same paper & borders up for 4 years, so I am ready for a change!

I have 2 adjacent boards just as you come into my room.  I've never really done too much with them... I can't really use them for anchor activities or teaching because they aren't in our teaching area.  So, I've mostly used them to display classroom rules and sometimes student work.

This is what they used to look like...  Blue paper and red/white checkered border.  {sorry, poor quality photo!}

I replaced it with black paper and red herringbone patterned border.  I also layered a green polka dot border at the top.

So, at this point, it looked better but, what to DO with it?  I've been seeing some super-cute student work boards on Pinterest and Instagram, so I decided to go with that.  I picked out 4 bright colors that went with the color scheme in my room and... voila!
I hot glued miniature clothespins to the top center of each piece of card stock.  This will allow me to easily change out student work.  I usually have 23-26 students each year, but I went ahead and put up 30 pieces of card stock.  I plan to put up some fun quotes in the extra spaces.  I'll post a picture soon of those!

Okay.  Now on to an epic FAIL!  Hopefully admitting my mistake will help some other teacher out there save some time & money!

I picked up some fadeless paper at our local teacher supply store in black.  What I didn't notice, until I was back in my classroom ready to hang it, was that I accidentally got GLOSSY paper, instead of regular paper.  Sigh.

I went ahead and hung it up, hoping for the best.  By the way, the boards I am using this on aren't actual bulletin boards.  They are white boards.  I have a huge amount of white board space in my room, but need more bulletin board space, so I usually hang paper up and use magnetic borders.

Long story short, when I came back in the next day, the paper had bubbled horribly.  I was already not loving the glossiness of it, and now THIS.  Worse yet, it wasn't just 1 board... I actually have 3 boards, just like this, with the horrible, glossy, bubble thing going on.  Ughhhhh!!!!! 


I wonder if it's because I'm covering white boards and not a regular bulletin board... maybe the sleekness made it bubble?  I don't know.

You can bet I ripped that right down and went back to the teacher store for regular black!  Ahhhhh!
Friends, if you don't like the glossy, bubbled look, read the label.  You're welcome!  ;)

Dollar Spot Find

While shopping the Dollar Spot at Target, I spotted some fun plastic toys and snatched some up.

First, I found these plastic figures and thought they would make fun game pieces.


 My Target had three different choices (shown above). 

How fun will these be to spice up your games?

Fairy Tales...
 Dinosaurs...
 Mystical ponies...

I also found some cool little building blocks and, since I've been on the lookout for some new, inexpensive indoor recess toys/games, I snatched up two of each.

The ones in the packages are kind of like gears.  They come in two different color varieties.
 
These ones also came in two different color choices but I didn't take a photo of the packages before dumping them in a storage container.
For a buck, I couldn't pass them up!

The back of the packages show some interesting things you can build with these.  I didn't take the time to be creative with them for the sake of showing you in this blog post.  You'll have to use your imagination!

Hope someone might find these useful!  Gotta love that Dollar Spot!!