Happy New Year everybody! I put it off for days, but the pull of getting in to school and getting a few things organized and ready for the new year got me yesterday! I'm sure many teachers feel the same way. On one hand, it's winter break and we deserve to sit around in pajamas all day doing whatever. On the other hand, we feel anxious about the amount of work that lies ahead and wouldn't it be great to get some of it done so we can feel at ease about going back to school? So, off to school I went.
It's quite frigid in Indiana... We are experiencing some record breaking low temps. As I'm typing this it's warmed up to a brisk 1 degree this morning - brrrr! I think we can count on some indoor recess time this coming week when we head back to school.
We do get a teacher work day this Wednesday before the kids begin on Thursday; however it's never enough time for me to get it all done. Lesson planning, report cards, meetings, and organizing just can't get done in one day. So, I usually will come in one day during break to get cracking.
It's sort of depressing, though. As I walked toward the building amidst the fresh-fallen snow from the night before I realized there are no other tire tracks in the parking lot, nor footprints in the snow leading to the door. I guess I'm the only one who's made the trek in. That's okay, though. Even though it's a bummer to spend part of my winter break working, I will enjoy the rest of my break knowing that I'm organized and well-prepared.
And, I'm getting two new students on the first day back. TWO!!! This, on top of a third new student I received just 2 weeks before break. So naturally everything has to be re-labeled. Closet labels, the class list posted outside my door, lunch choice sticks, etc. This will be new student number 5 and 6 for me this year... it's been that kind of year, very transitional.
I have a very diverse group this year. I'm the 1st grade high ability teacher, which is new to me, and I also have a cluster of ENL students. On top of that, I have received a cluster of gen. ed. students as well. Can you say differentiated groups? Our district also adopted all new curriculum this year. ALL! As in new math, reading, and writing curriculum. It's been a challenging year for me all around.
So, as I'm thinking forward to the new year, yesterday's school visit was all about getting organized, setting up new groups and partners, cleaning up and de-cluttering. I spent about 5 hours doing just that and I could have spent at least another 5, but the sun was beginning to set. This beautiful view out my classroom window reminds me that tomorrow is another day and I can't get it all done. Like, ever! But, I can be content that I'm doing all I can for my students and for myself and that's a good feeling.
Happy New Year! Let's make it a great one!
International Dot Day
Life lessons we learned today from reading The Dot by Peter H. Reynolds. Happy International Dot Day!
Do you celebrate Dot Day at school?
Do you celebrate Dot Day at school?
What's in YOUR Pocket?
You might be a teacher if this is the contents of your pockets come laundry day!
What's in your pockets?
What's in your pockets?
It's the TPT Back to School BONUS Sale!
Shop my store and be sure to use the promo code BTSBONUS to save up to 25%.
Shop my store and be sure to use the promo code BTSBONUS to save up to 25%.
TPT Back to School Sale!
It's here! It's here! Tomorrow begins the TPT Back to School Sale! My cart is loaded and I'm ready to save! How about you?
Everything in my store is on sale! Check out my products HERE. Don't forget to enter in the promo code to receive the 25% off! Happy Back to School shopping!
Everything in my store is on sale! Check out my products HERE. Don't forget to enter in the promo code to receive the 25% off! Happy Back to School shopping!
Prepping for Birthdays!
I just finished prepping birthday balloon Krazy Straws for my incoming students. I shared last summer how I celebrate birthdays in my classroom. {You can read about it here.}
The balloons are blackline printables {available in my TPT shop} that can be printed onto any color paper or card stock you choose. So, if your color scheme is bright pink and aqua, simply print them on that color paper. Or, if you want to match them up to other birthday surprises you bought (for instance, I have rainbow colored bracelets I give out), you can use paper to coordinate.
I have two patterns available, Stripes and Polka Dots.
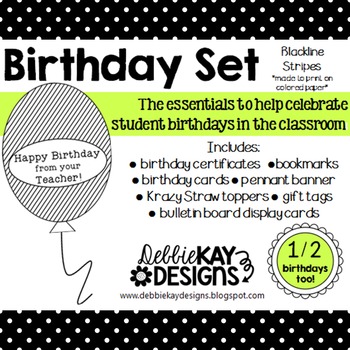
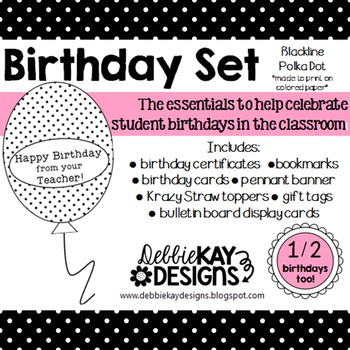
Simply print on paper and laminate. Alternatively, you could print onto card stock and then you may not need to laminate.
Cut the balloons out. I will share a fantastic tip I learned when I taught paper crafting and card making classes: When you cut around outline images, leave a border. Do NOT cut on the black outline. When you cut on the outline, you will have a difficult time getting it perfect. At least, the perfectionist in me was never satisfied with it - I either cut too wide or too narrow. And, as a busy teacher, I don't have time for that kind of perfection for something like this. It's much easier, and quicker, to cut by leaving a border.
I leave about 1/8" space around the border. When you do it this way, you will not notice any imperfections in your cutting.
After cutting, just add a couple pieces of Scotch tape or washi tape to the back side to add the Krazy Straws. I purchase the Krazy Straws from my local Dollar Tree.
I display the birthday balloon Krazy Straws in a small glass vase. My kids eye them all year and can't wait until it's their birthday so they can pick one out!
Thanks for checking them out!
The balloons are blackline printables {available in my TPT shop} that can be printed onto any color paper or card stock you choose. So, if your color scheme is bright pink and aqua, simply print them on that color paper. Or, if you want to match them up to other birthday surprises you bought (for instance, I have rainbow colored bracelets I give out), you can use paper to coordinate.
I have two patterns available, Stripes and Polka Dots.


Simply print on paper and laminate. Alternatively, you could print onto card stock and then you may not need to laminate.
Cut the balloons out. I will share a fantastic tip I learned when I taught paper crafting and card making classes: When you cut around outline images, leave a border. Do NOT cut on the black outline. When you cut on the outline, you will have a difficult time getting it perfect. At least, the perfectionist in me was never satisfied with it - I either cut too wide or too narrow. And, as a busy teacher, I don't have time for that kind of perfection for something like this. It's much easier, and quicker, to cut by leaving a border.
I leave about 1/8" space around the border. When you do it this way, you will not notice any imperfections in your cutting.
After cutting, just add a couple pieces of Scotch tape or washi tape to the back side to add the Krazy Straws. I purchase the Krazy Straws from my local Dollar Tree.
I display the birthday balloon Krazy Straws in a small glass vase. My kids eye them all year and can't wait until it's their birthday so they can pick one out!
Thanks for checking them out!
Classroom Curtains
One of the summer projects I needed to complete was to make changes to my current classroom door window covering so that I could keep it open. Originally, I put up the curtain using Velcro dots and it just remained closed all the time. That worked fine, until our principal asked me to keep it open. The Velcro dots were not working, so I needed another plan.
Rather than start from scratch, I just sewed a hem at the top of the curtain. I bought a small wooden dowel at the craft store and inserted it through the hem. Then, I hung it up using Command Hooks. To keep it open, I used some ribbon I had on hand (it's amazing what you find in your classroom closets) and tied up the curtain. Voila!
Now, if I need to close my curtain in a hurry, I can simply untie the ribbon. Another summer project off my list!
The Pigeon!!!!!!!
Don't Let the Pigeon Go to School! Oh, who am I kidding? This pigeon MUST come to school with me!
Run, don't walk! Kohl's does it again with their selection of books and stuffed animals supporting Kohl's Cares. This time it's Mo Willems book characters. Oh. My. Goodness!!
I did a whole writing unit on the Pigeon books this last year with my first graders and it was a HUGE hit! My kids loved the Pigeon and I know they will love having this little guy sit in our classroom this year.
Thanks, Kohl's!
P.S. You can find other characters, too! Elephant, Piggie, Knufflebunny... I just LOVE that Pigeon!
Last Day of School
Just in time for those adorable last day of school pics, I posted a new Last Day Chalkboard Sign to my TPT store.
These coordinate with my First Day of School Chalkboard Signs and can be used to take those adorable first/last day of school pictures in the classroom.
The signs are editable, so you can customize to fit your needs:
Preschool
Kindergarten
1st Grade (2nd, 3rd, etc.)
Homeschool
Jr. High
High School
... whatever you want!
Simply print and use. You might choose to put it in a picture frame, laminate it, attach to cardstock or poster board, etc. Use it any way that suits your needs.
You can add it to your cart HERE.
While your at it, be sure to also pick up my First Day of School Chalkboard Sign so you'll be set to start the new school year, too!
Switch! Spelling Game
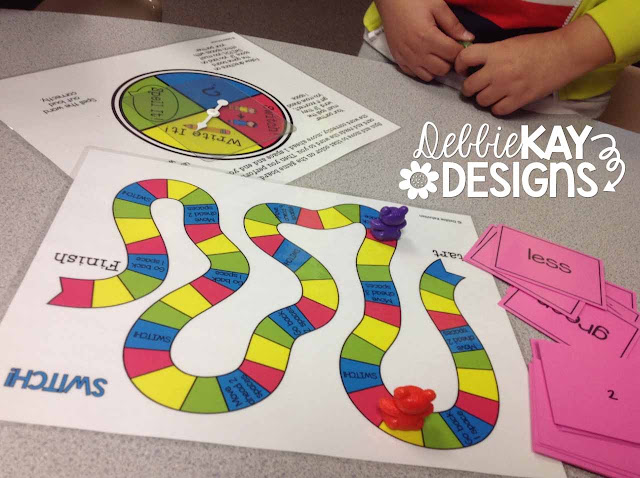
A month ago I decided I needed a new way for my students to practice spelling skills. I wanted to create a game that was engaging, not only for the player whose turn it was, but for both players at all times.
You know what I'm talking about. When two kids are playing a game and one of them isn't paying attention because it's not their turn. They're looking around, disengaged, and definitely not learning. Not with this game!
When I created Switch!, I made sure that both students would have a job to do no matter whose turn it was. Here's how it works:
Player 1 spins and moves to the color they spin. Then they perform a task. Here's where Partner 2 plays a role because if Player 1 spins "Write It" or "Spell It" Player 2 is drawing a Word Card for Player 1 and reading it to them. Player 1 is either writing the word or spelling it verbally while Player 2 checks the spelling. If they spin "Switch" the players reverse roles. If the spinner lands on the blue question mark, Player 1 moves and follows directions on that space, which may include switching spaces on the game board with their partner. That always gets their attention!
Also, I built in a reward for spelling words correctly: they get to move a bonus space. So, no penalties for errors, but positive reinforcement for getting it right. Boy, do my kids try hard to get it right!
When I introduced this game to my students, I did so in small groups. It took several turns for them to learn the rules, but after that they flew! Now I just place 3 sets of the games in my word work bins and they are able to play independently.
My students are loving this new game. I am seeing a high level of engagement and improvement in their spelling skills, especially for the vowel teams and diphthongs we've been working on. Each week, I print out a new set of word cards and I'm ready to go.
You can check out my Switch! game on TPT here.
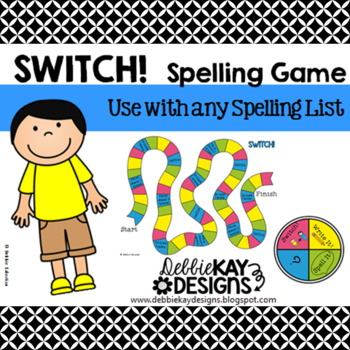
I hope your students love it as much as mine do.
You know what I'm talking about. When two kids are playing a game and one of them isn't paying attention because it's not their turn. They're looking around, disengaged, and definitely not learning. Not with this game!
When I created Switch!, I made sure that both students would have a job to do no matter whose turn it was. Here's how it works:
Player 1 spins and moves to the color they spin. Then they perform a task. Here's where Partner 2 plays a role because if Player 1 spins "Write It" or "Spell It" Player 2 is drawing a Word Card for Player 1 and reading it to them. Player 1 is either writing the word or spelling it verbally while Player 2 checks the spelling. If they spin "Switch" the players reverse roles. If the spinner lands on the blue question mark, Player 1 moves and follows directions on that space, which may include switching spaces on the game board with their partner. That always gets their attention!
Also, I built in a reward for spelling words correctly: they get to move a bonus space. So, no penalties for errors, but positive reinforcement for getting it right. Boy, do my kids try hard to get it right!
When I introduced this game to my students, I did so in small groups. It took several turns for them to learn the rules, but after that they flew! Now I just place 3 sets of the games in my word work bins and they are able to play independently.
My students are loving this new game. I am seeing a high level of engagement and improvement in their spelling skills, especially for the vowel teams and diphthongs we've been working on. Each week, I print out a new set of word cards and I'm ready to go.
You can check out my Switch! game on TPT here.

I hope your students love it as much as mine do.
Teacher's Assistants
How do you handle classroom jobs in your classroom?
I used to have a job for every student in my classroom. But, I always forgot who did what and got tired of referencing my job chart to find out. When we were out of the classroom, I never could remember who was in charge of what. No more!
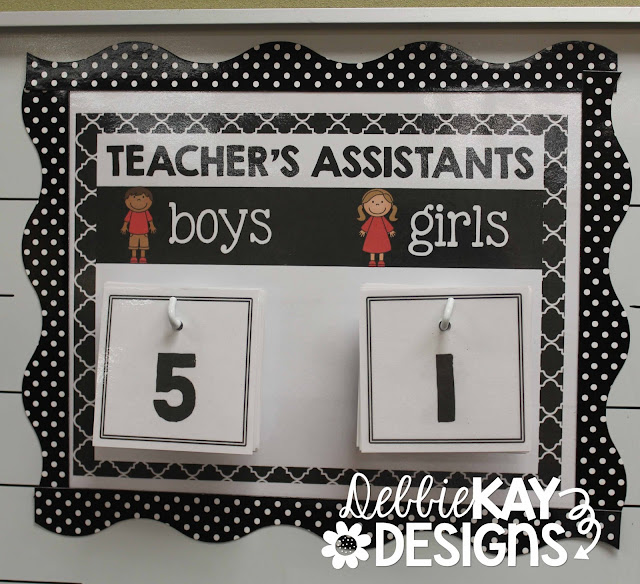
Now, I have 2 teacher’s assistants per day and they literally do ALL of the jobs that day. This method has really worked for me and has simplified managing student jobs. Everyone gets a turn at doing everything and I don’t have to keep track of which students have held certain jobs or not. Plus, I don’t have to dedicate as much wall space in my room for this simple little chart versus the entire bulletin board my former job chart took up.
Each day I have a boy and girl assistant. They are my line leaders, take lunch money to the café, return library books, pass out papers, EVERYTHING! They love being “in charge” for the day and I love not having the hassle of assigning jobs and keeping track of who is supposed to be doing things.
I put my Teacher's Assistants chart on TPT if you are ready to ditch your old system and simplify like I did! There are 4 different borders to choose from:
Included in this packet are number cards and choice of 6 different color charts. Please check out the preview to see color choices. Each chart has a black & white border.
**Please note that the magnetic border shown in the photographs is obviously not included. However, I wanted to show you how I hang mine in my own classroom.
Simply print out the chart and number cards, laminate, and hang. I punched holes in the top of my number cards and hang them from a magnetic hook. You'll want to assign each student a number. You may be like me and use student numbers for other things such as student mailboxes or desks. You're all set!
If you have any questions, I'd be happy to answer them. Leave me a comment below!
Thanks for stopping by!
Melted Crayon Heart Valentines
Still need a Valentine idea for your class this year? Here is what I am doing for my kiddos.
I'm sure you've seen these around. I got the idea from Pinterest a couple of years back. In the past I've simply put them in a cellophane bag; however this year, I wanted to do something different. So, I whipped up these cards. The crayon heart attaches to them with a few dots of hot glue.
Here are the instructions to make these:
1. Gather all the broken and old crayons from your class. For me, this is simple because at the beginning of each new year I swap out my students old crayons for a brand new box, then I set the old broken crayons aside for this Valentines Day project.
2. Peel off the paper. This is the tedious part. Grab a beverage and something good on T.V. and peel away. Some wrappers come off easily and some don't. I have found that what works best for me is to use a small utility knife and cut a slit down the length of each crayon. The wrapper will peel right off.
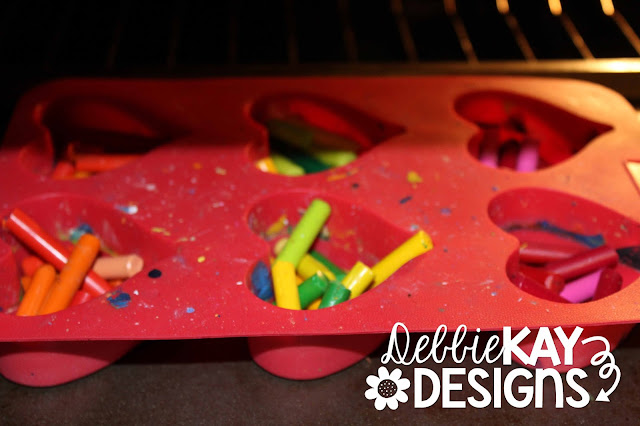
3. Put crayons into a silicone mold. These are pretty easy to find this time of year with the seasonal baking supplies.
4. Heat oven to 200 - 250 degrees. Place silicone mold onto a cookie sheet and place in oven. Heat until melted, about 15 min.
5. Be careful taking out of oven. Try not to mix up the colors. You want to be able to see each individual color. (Unless, of course, a more solid color is the effect you're going for.) Let cool. Hint: Once the was has solidified enough for me to move it, I place the mold in the freezer to cool it quicker.
6. Carefully pop out the heart-shaped crayons and attached to a card front using a few drops of hot glue or strong double-sided tape.
How to prepare cards:
1. You can purchase my cards here.
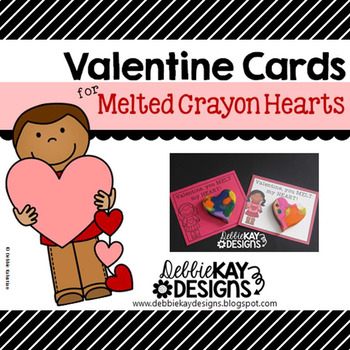
2. You can either print out color copies onto white card stock, or use the blackline masters to print onto colored card stock. Your choice!
3. Cut out cards. There are four cards on each sheet.
Enjoy! I hope this helps someone else out there with putting together a last-minute fun idea for your classroom Valentines.
I'm sure you've seen these around. I got the idea from Pinterest a couple of years back. In the past I've simply put them in a cellophane bag; however this year, I wanted to do something different. So, I whipped up these cards. The crayon heart attaches to them with a few dots of hot glue.
Here are the instructions to make these:
1. Gather all the broken and old crayons from your class. For me, this is simple because at the beginning of each new year I swap out my students old crayons for a brand new box, then I set the old broken crayons aside for this Valentines Day project.
2. Peel off the paper. This is the tedious part. Grab a beverage and something good on T.V. and peel away. Some wrappers come off easily and some don't. I have found that what works best for me is to use a small utility knife and cut a slit down the length of each crayon. The wrapper will peel right off.
3. Put crayons into a silicone mold. These are pretty easy to find this time of year with the seasonal baking supplies.
4. Heat oven to 200 - 250 degrees. Place silicone mold onto a cookie sheet and place in oven. Heat until melted, about 15 min.
5. Be careful taking out of oven. Try not to mix up the colors. You want to be able to see each individual color. (Unless, of course, a more solid color is the effect you're going for.) Let cool. Hint: Once the was has solidified enough for me to move it, I place the mold in the freezer to cool it quicker.
6. Carefully pop out the heart-shaped crayons and attached to a card front using a few drops of hot glue or strong double-sided tape.
How to prepare cards:
1. You can purchase my cards here.

2. You can either print out color copies onto white card stock, or use the blackline masters to print onto colored card stock. Your choice!
3. Cut out cards. There are four cards on each sheet.
Enjoy! I hope this helps someone else out there with putting together a last-minute fun idea for your classroom Valentines.
Subscribe to:
Comments (Atom)


