When I changed my classroom to flexible seating, I needed a place to store my students' folders, notebooks, etc. So, I purchased some "Book and Binder Holders" from Really Good Stuff.
I ordered enough to fit in the top two shelves of these bookcases. Last year I had 24 students, so this was the perfect set up. I have several extra bins in case I ever need more.
My students each have a student number assigned to them. This way I can number some things in my classroom and not have to re-label each year with student names. For instance, student mailboxes are numbered. I knew I also wanted to number these new book bins to use each year.
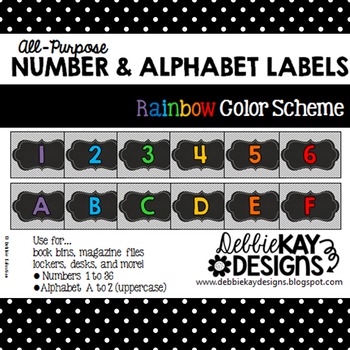
These labels are super cute with a simple black & white striped background and numbers in 6 colors of the rainbow. I thought that having different colors would help students quickly find theirs versus everyone having the same color.
I'm sharing my labels with you on TPT now. Numbers go up to 36 - I can't imagine a class with more than 36 students! Eeek! I also included alphabet labels A-Z.
Here are just a few ideas of what you might use these labels for:
* Leveled library
* Student book bins
* Math tubs
* Literacy stations
* Word walls
* Locker or closet numbers
* Desk numbers
* Student numbers for various things
* Anything you need a number or alphabet label for!
* Student book bins
* Math tubs
* Literacy stations
* Word walls
* Locker or closet numbers
* Desk numbers
* Student numbers for various things
* Anything you need a number or alphabet label for!
>>>TEACHER TIP!! <<<
The labels are sized approximately 2.5" x 2". Here's a little tip for you from my days of teaching card making and scrapbooking... When you cut things out, leave a border. In other words, do not cut on the black line that borders these labels. First of all, the border is part of the design and you don't want to lose that design element. Secondly, it's tough to trim right on the line and be precise enough that it looks "professional". Leaving a border allows you to not have to cut so precisely. Always trim a small border of white space around things as shown below.
The labels are sized approximately 2.5" x 2". Here's a little tip for you from my days of teaching card making and scrapbooking... When you cut things out, leave a border. In other words, do not cut on the black line that borders these labels. First of all, the border is part of the design and you don't want to lose that design element. Secondly, it's tough to trim right on the line and be precise enough that it looks "professional". Leaving a border allows you to not have to cut so precisely. Always trim a small border of white space around things as shown below.
See the difference? And that's my free tip of the day for ya!
My All-Purpose Number & Alphabet Labels are available here on TPT. I hope you find many uses for them.
Thanks for stopping by my blog today!


No comments:
Post a Comment